The Moveable Feast Food Blog

The Moveable Feast is a Personal Chef Service that serves the Hampton Roads area of Southern Virginia. This blog is an extension of my web site www.themoveablefeastpcs.com and will go into more details about food and any food service industries. Any pictures and or recipes that are published here are all the property of The Moveable Feast unless otherwise noted.

Wednesday, April 26, 2006

Food Greetings from a Friend
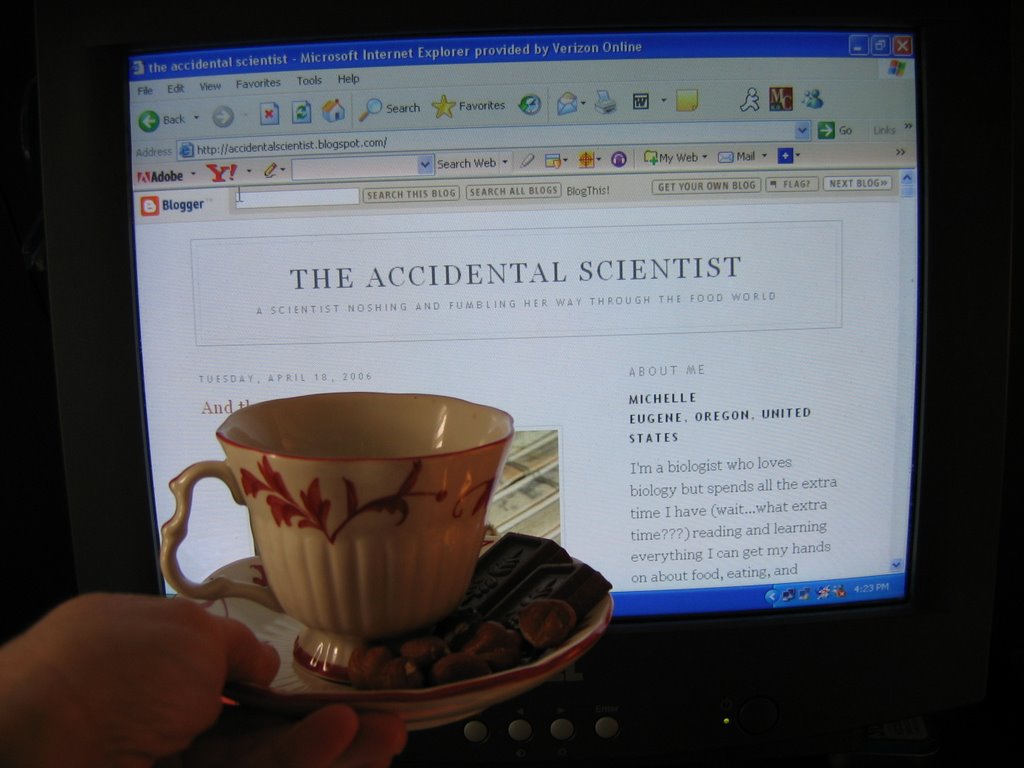
I am so lucky to have met the nicest most generous blogger friends. I am not sure exactly how I met Michelle from The Accidental Scientist but I certainly am thrilled. Michelle's site has been funny and informative about things that I have never eaten, drank or even considered trying. That's the best part of being blogger friends; we all live and learn about food via each other. My first lesson about Oregon food was with Michelle's very
first box for me.

It was filled with all kinds of Oregon based foods. I went nuts over the Hazelnuts that she sent me. I think I ate that whole bag over a few days all by myself! Shame on me. I had promised to make something with the hazelnuts. All I did was make pounds for myself. I did eat the little jar of honey and it was savored with every whole wheat English muffin that it was spread on. Hubby and I drank every drop of the Oregon Chardonay and loved it.

I got home from work last week and found a box on my front porch. I didn't remember ordering anything from the mail. Maybe it was the neighbor's box. He can't seem to remember his own home address when he orders car parts for his beloved race car. I looked at the return address and knew this was no mistake. I got a box from Oregon!

I threw down my purse and cut that box open with scissors so fast it surprised me. It was Christmas in April, which is a good thing. This is what I found inside.


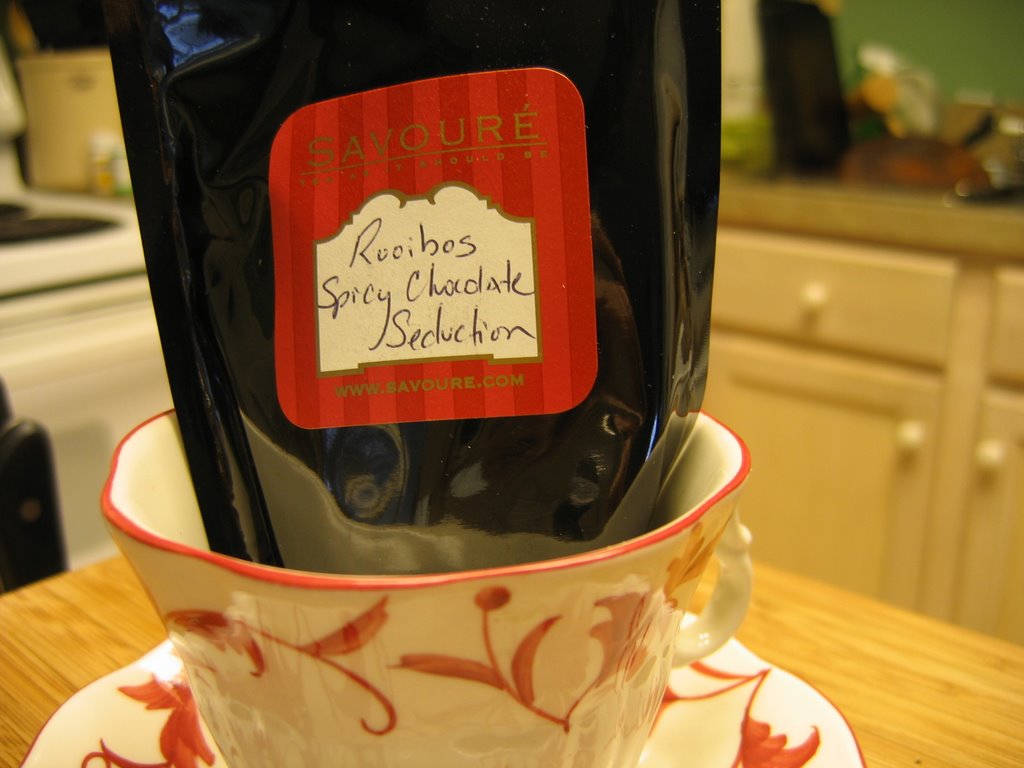
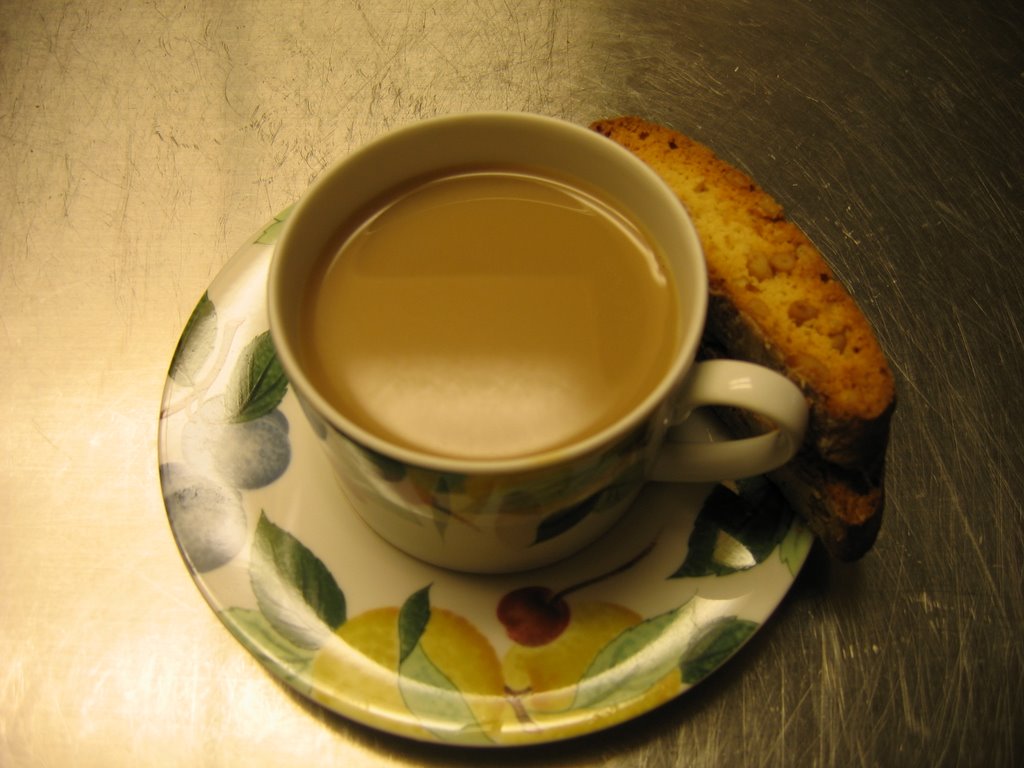
I have to talk about these two first items in glowing terms. I love tea. I am not expert by any means but I am learning all the time. I am into Harney& Sons Chocolate Decaf Oolong tea. My new daughter-in-law ordered some for me one year for Christmas and I have been hooked ever since. I now order it on-line and panic if it takes very long for that little brown box to appear on the front porch. Michelle pays attention, far better than I ever guessed! So there was a little bag of Rooibos Spicy Chocolate Seduction tea in the box along with lovely cup and saucer to drink the tea from. The tea is from Savoure.

Here is what it looks like in the tea basket before brewing
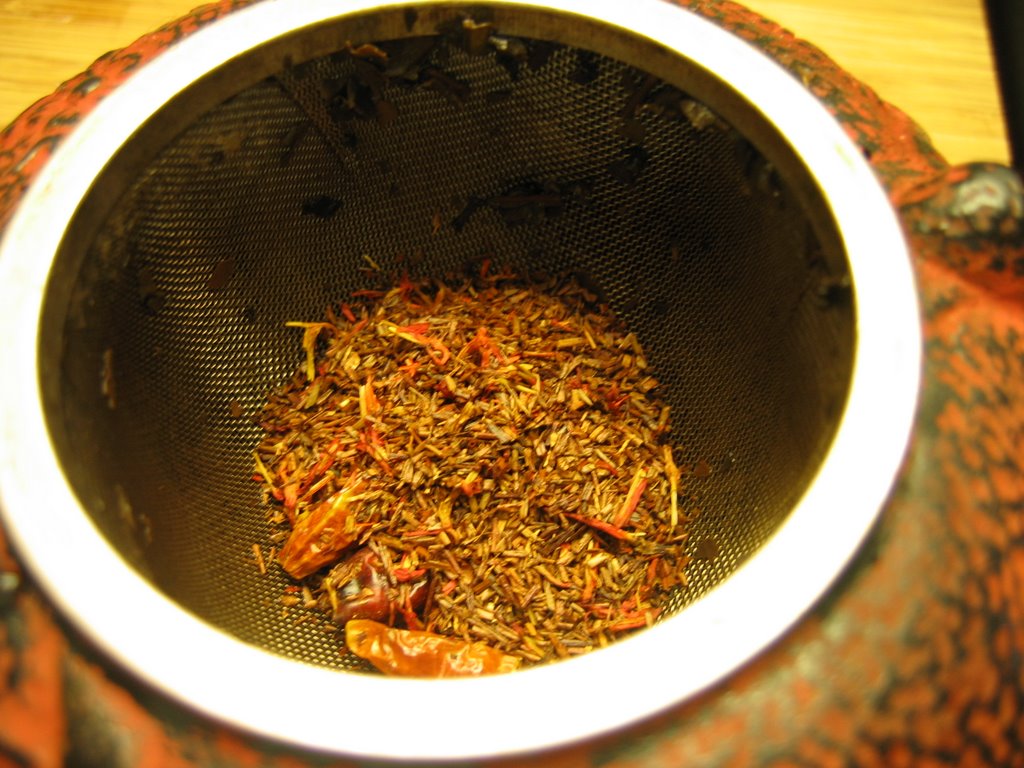
. I have to say that I really didn't pay close attention to what the tea looked like in my haste to brew it. I boiled the water, poured it into the pot, poured out the hot water, then added more hot water to actually brew the tea. I set the timer on the microwave for 4 minutes and got my new cup and saucer ready for the new brew. Of course I poured just a bit of milk in the bottom of the saucer. I paced and paced, looked at the microwave, unloaded the dishwaser and ding! It was time. It smelled so good. I poured it into the cup and and had a sip. It was good, really good. Then...a little tickle in the back of the throat. What was that?? Did I denote some pepper? HOT PEPPER? Whew! I had to have another sip. There was that tickle again. Okay, now I have to look into the wet tea in the basket. There on the top were three little tiny red things. Oh, lord-there were peppers in there. This called for another look...in the dry tea pouch. There they were, tons of little red chili peppers just waiting to heat up my life. Yummy. I have had never had tea with peppers. It was good. And it shocked me. I loved it. I had to have another pot. I was so taken aback with the spiciness of the tea and that I loved it. So now I have expanded my tea tastes to spicy tea. What a thrill to learn something about my tea tastes.

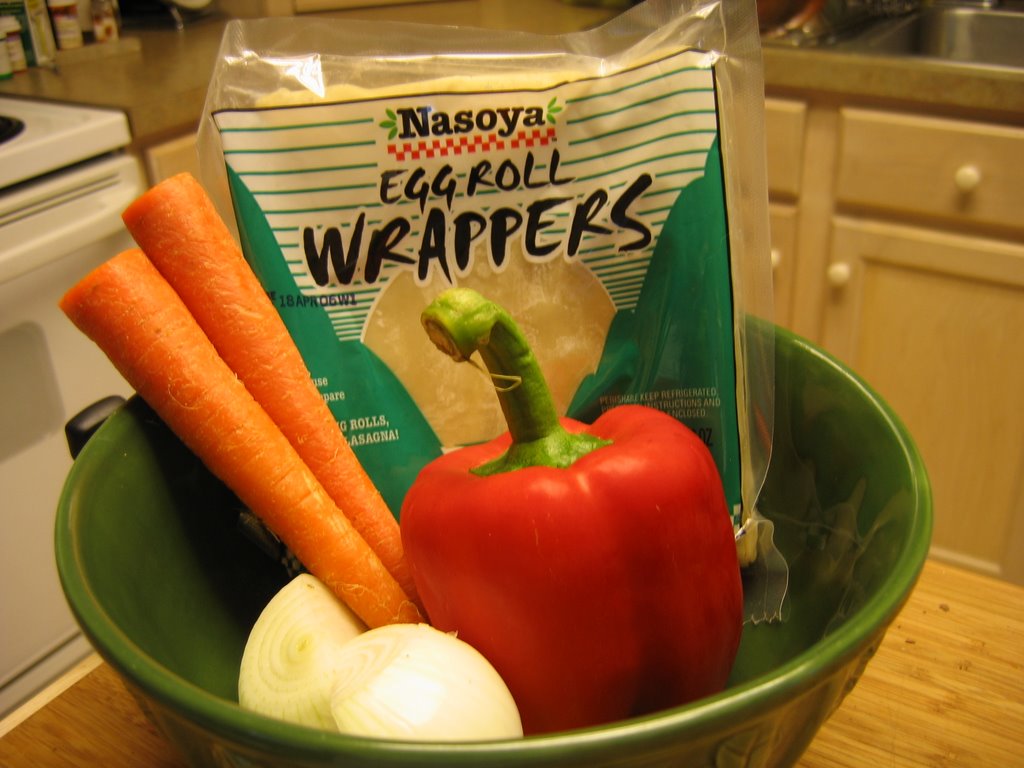
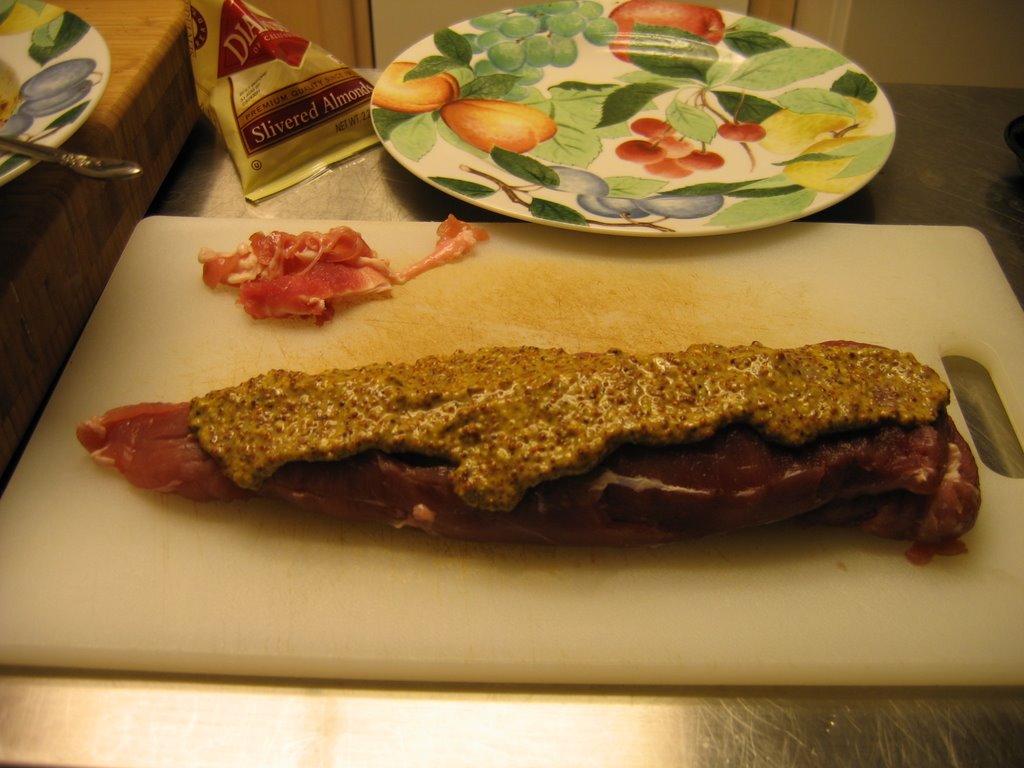
Here is the complete box contents.
I got two bars of soap. I collect handmade soaps (Michelle knew nothing about this) for a basket in all my bathrooms. 
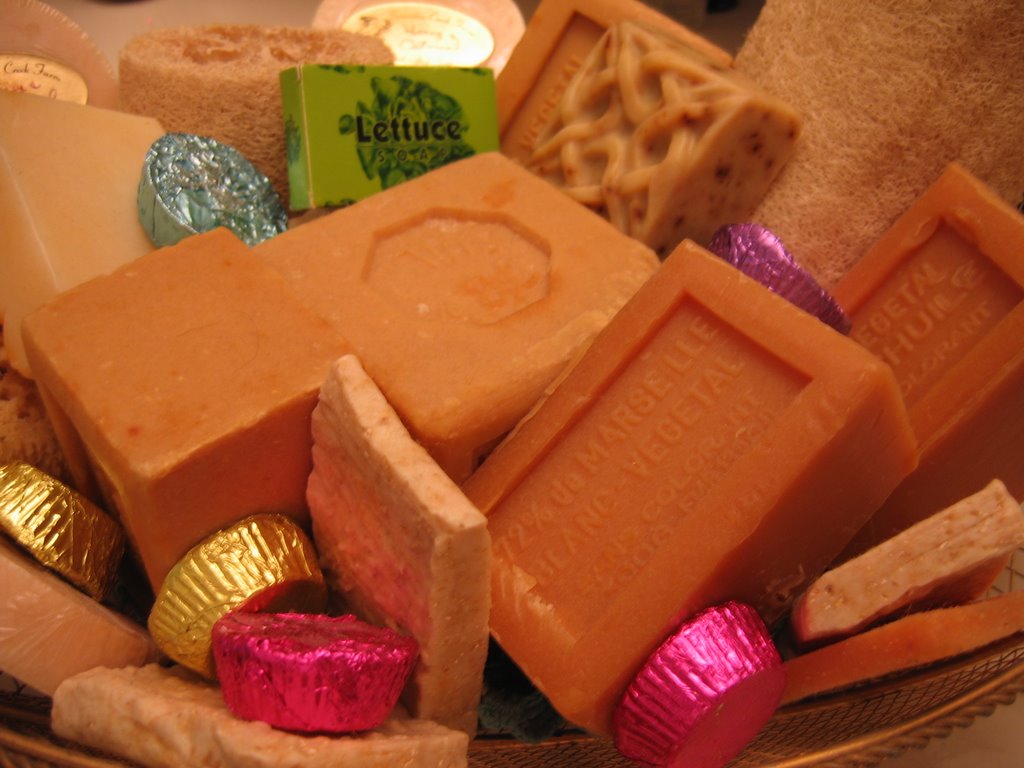
I just love them and they each unique and have a story about where it was purchased and usually I get to meet the creator. The first box is a little green box of lettuce soap. It's white so that threw me. I thought for sure it would be green. Nope, just lettuce extract. After my tea experience with those little peppers, I read the soap ingredients. It's surprising what you learn if you only take a moment to read things. Duh! lol!

The second bar of soap is the one with the lovely pattern on the top (let me give you this disclaimer before you click on the link I have provided-there are examples of a shapely naked woman with bare breasts as soap bars-read the site, it has an interesting story about all her handmade soaps.) and it's made from goat's milk. Alsea Acre Alpines has more to offer so check out their homepage.

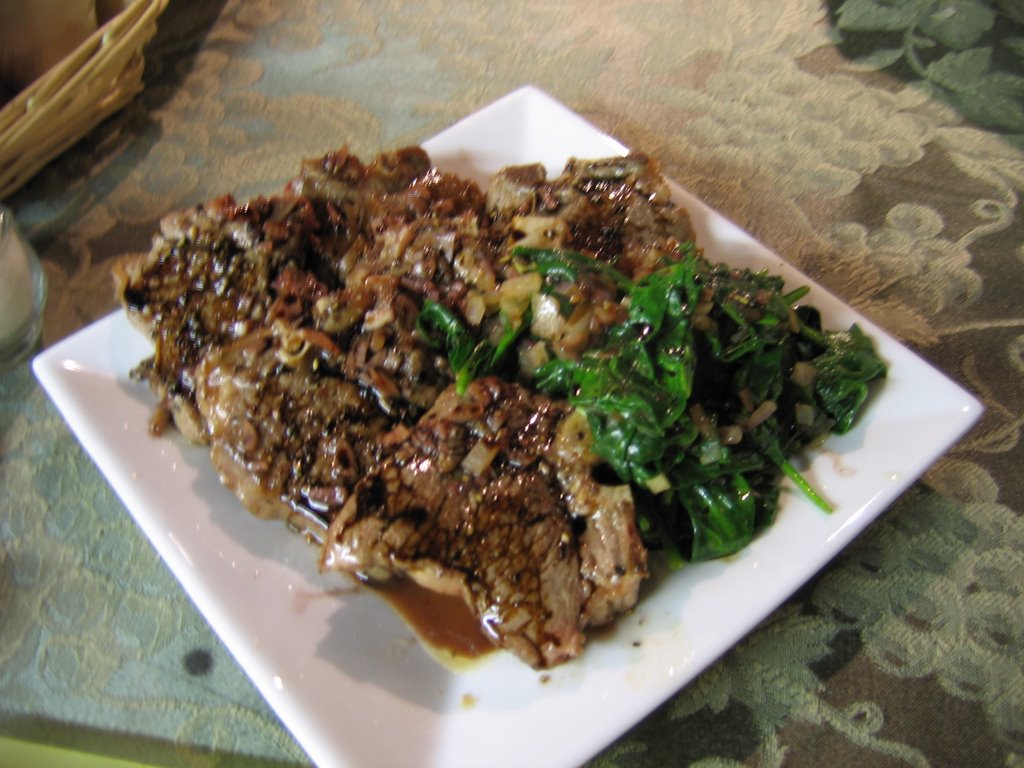
Next, there was seafood from the god Neptune-CRAB! I live near a huge mecca for crabs. I think that if you live near the Chesapeake Bay it is mandatory that you either love crab, or catch for those who do; plain and simple. I love crab! I have eaten every way you can fix a crab cake in this world. I am not sure where my love for crab came from but who cares. I will make crab cakes with this special can of love from the sea soon and post it here along with the recipe. The recipe wheels are churning! The company is Chuck's Seafood.

I am not sure I should talk about the huge Hazelnuts...I could show you the bag about 6 hours later, but I am sure you all have seen empty bags...need I say more??? I can't get enough of them. I wanted to give you a link to River Bend Farm so you can do business with them, but when I did a search, I couldn't find a site for them. So here is their phone number 541-741-1411.

Thanks Michelle! You are so generous and I do appreciate the love from Oregon.

Monday, April 24, 2006

Lumpia
I am married to someone who was in the Navy for a little over 20 years. That means I have logged a lot of travel miles, packed a pagillion times, lived at five different duty stations, lost and gained an array of different kinds of friends along with their native food cultures. I think I stumbled on to the most wonderful group of women across the country when I joined The Navy Wives Clubs of America. This is a group of women whose husbands are either active duty or retired military. They are united by that common bond. I can’t remember exactly how I found my very first group in Horsham, PA, but it was where my very first experience happened with friends intermingled with food.

Since the NWCA is a 5013C organization, they are all about raising money for the 40 scholarships for deserving hard working college bound kids. There are clubs all over the United States and each club raises money that goes into the collective national pot. Raising money has to be fun and creative. Some had thrift shops, some have all food related fundraisers and others do air shows at their local military base. We all had a great time even though some times it was back breaking work.

When we were stationed at NAS (Naval Air Station) Memphis, TN, I learned how to make Lumpia. I can’t tell you how many thousands of Lumpia I have rolled the four years that I lived there. We did bake sales but the Lumpia sales had the sailors lined up in hallways everywhere waiting for the piping hot, hand rolled Filipino food. Lumpia is easy to make and very easy to eat as well as addictive, and I mean that in a good way…

Lumpia’s native origin is in China. Yes, China. Most people, who know about Lumpia, believe it was born in the Philippines. I am one of those people until this past weekend when I was doing research for this blog entry. I was a bit surprised! No matter where Lumpia was created they honed to perfection, it’s still great finger food.

Lumpia can be made with a variety of fillings, sizes and wrappers. This past weekend since I had bought Egg Roll Wrappers, I made mine with those. My preference is the actual Lumpia wrapper. They are thinner and are crispy perfection when fried to a golden brown. You will not soon forget that lovely crunch when you take your first bite.

To make Lumpia NWCA style, the club bought the ground beef and all the members brought in the rest of the fillings needed. We usually did onions, carrots and green bell peppers. I can’t remember if we used soy sauce or corn starch but I know there are some recipes that use those ingredients as well as minced garlic and ginger. Some even use shredded potatoes to stretch the recipe.

All the vegetable ingredients need to be finely minced. A mini chop or a food processor works great and its okay if it’s on the mushy side. It makes it easier to roll. Chunky Lumpia is a bit of a challenge because it pokes through the wrapper.


Here is what I used and how I made the Lumpia. I hope that you try this. The ingredients are very common to any part of the country and even easier if you live near an Asian Market.

I used these ingredients that I had on hand; 1 white onion, 2 medium carrots, 1 red bell pepper, and the Egg Roll Wrappers. The vegetables were chopped up in the food processor one at a time.


The commissary like so many other grocery stores, never packages up an even pound of meat so this is about 1 1/2 pounds. The amount of beef or protien that you use doesn't really matter.

Here I am with a little log of the meat mixture that includes all the vegetables.

I just put the wrapper at an angle and then began to roll but only about 1/3 of the way.

After rolling, I folded the edges up sort of like a homemade envelope.

After you fold the ends up you just roll it up like this...

Doing three of four at one time makes the task go much quickier. After rolling the Lumpia, I put them in the refrigerator so the wrappers could stick to themselves on the seam side; about 30 minutes will do. At this stage if you don't want to cook the whole batch, you can freeze them. Put a piece of wax paper between the layers if you are stacking them. Fry them from the frozen state if you are saving them for a later date. They tend to get sticky if you thaw them out and are a mess to handle. They fry up great whether fresh or frozen. It doesn't take long and you will need to hang close to the stove.

I have used soy sauce with minced ginger and garlic as a simple dipping sauce but I really love Plum sauce. It's sweet and adds something wonderful to the Lumpia when dipping it.


Sunday, April 23, 2006

Weekend Dog Blogging
There is a great place to check out other blogger's pet dogs. Swing or click by Cate's site to view all the pretty pooches!
Sadie is relaxing in my office instead of helping me clean up! She is getting more like a teenager everyday!

Thursday, April 20, 2006

A Proper Cup of Tea
A proper cup of tea should be enjoyed with a friend. Here's to you Michelle! You are just a peach!

Wednesday, April 19, 2006

Yet another use for Pesto!
I made so much Pesto last fall that I froze it. I still have some in the zip bag and when I read this recipe, I knew I had a short cut for dinner! I am all about not spending a lot of time doing dinner on a weeknight. I would rather fuss around with food on the weekend when I have more time. It’s supposed to rain all weekend so I will have plenty of time in the house since I won’t be in the fledging garden.

This recipe is from the same place as the Primavera Chicken Brochettes. I really liked this recipe and it got a thumb’s up from hubby. Leftovers are on the menu for tomorrow for hubby at work. This recipe has a lot of ingredients but you can take some short cuts which I will talk about at the end. Here we go!

Chicken Ala Biagio
Serves 4

4 Chicken breasts, boneless, skinless
Salt and pepper to taste

Pesto Filling
8 oz fresh basil stems removed
2 medium cloves of garlic
3 oz pine nuts
1/8 cup olive oil
1/8 cup Parmesan cheese

Chicken
2 cups Italian Blend cheese, shredded
½ cup all-purpose flour
2 eggs, beaten
¾ cup Italian bread crumbs
¾ cup butter

Sun-Dried Tomato Caper-Sauce
1 TBS olive oil
3 medium shallots, finely minced
2 medium garlic cloves, minced
8 sun-dried tomatoes in oil, drained and minced
1 cup white wine
1/8 cup heavy cream
2 TBS capers, drained
¼ tsp thyme, fresh
4 TBS butter
1/8 cup parsley, minced
Fresh basil, garnish

Place chicken breasts between sheets of plastic wrap and pound with meat mallet to even thickness about ¼ inches. Season with salt and pepper to taste. Set aside.

To make Pesto, place basil, garlic, pine nuts, olive oil, and parmesan cheese in a food processor with steel blade and process to a paste-like consistency. It may be prepared in advanced and refrigerated.

Preheat oven to 350F. Place equal portion of Italian Cheese in center of each flattened breast and spoon 1 TBS prepared Pesto in center of cheese. Roll breasts, tucking in ends, to completely enclose filling. Secure with toothpicks. Unused Pesto may be frozen for later use.

Place flour, beaten egg and breadcrumbs in three separate shallow dishes. Lightly coat filled chicken breast with flour, dusting off excess. Brush all sides with egg and then roll in breadcrumbs. Repeat with other breasts. Heat ¾ cup butter in heavy skillet until melted. Brown filled breasts on all sides. Transfer to lightly greased baking pan and bake 20-30 minutes until temperature on meat thermometer reaches 160F and juices run clean when pierced with knife.

To prepare sauce, place 1 TBS oil in saucepan. Sauté shallots, garlic and sun-dried tomatoes until tender. Add wine and cook until reduced by half. Gradually add cream while stirring. Add caper and thyme and again reduce by half. Whisk in butter, 1 TBS at a time until consistency is creamy. Add parsley and season to taste with salt and pepper.

To serve, remove toothpicks and place on a serving dish. Top each breast with sauce. Garnish with fresh basil of desired.


Note: I think you can save yourself some time if you buy the jarred Pesto and then freeze the rest in an ice cube tray for later creations. I also don't like using regular bread crumbs so I made a mixture of Panko bread crumbs with dried basil, oregano and thyme. I like the flakiness of the Panko much better than the other recommended crumbs. I cut some of the fat out of the recipe by using dried Sun-Dried tomatos and soaked them in boiling water about 15-20 minutes. They worked just fine in the sauce without being soaked in olive oil. There is way too much butter to saute the chicken breasts in. I ended up throwing about half of it away. You do need the in the last part of the recipe for the sauce, no skimping on that part.

Monday, April 17, 2006

It’s Grillin’ Time!
This is one of my most favorite times of the year. The weather is cooler and the days are getting longer so eating late doesn’t bother me so much. We are usually working in the yard mowing, pulling weeds and planting things and we lose track of time. I do my best to marinate a meat of some kind and fix a side of some veggies to grill beside the meat. This recipe kills two birds with one stone and I love those kinds of meals. This was tasty and easy so it’s my kind of a food!

I found this recipe in my local grocery, Farm Fresh. They put these little pamphlets once a year and this is my second year to pick on up. I got one recipe from last year that I used for my clients and have since lost the pamphlet, but this one will yield more. I have found that out of 6 winning recipes, I will try 4 for sure. There are two recipes that involve a roasted chicken and well all know how that has turned out for me so I think I will not be trying them any time soon. Besides the weather is getting warmer and I really don’t want to heat up the house for a burned chicken…you can understand my dilemma.

The recipe I used this weekend comes from Gold Kist Farms Chicken Recipe Contest. I picked this one because it was the easiest one to start with. It’s a winner as far as I am concerned.

Primavera Chicken Brochettes
Yields: 6 servings (12 brochettes)
2 pounds Gold Kist Farms (or any brand) boneless, skinless, split breasts
2 zucchini, cut crosswise into 6 slices, ¾ inches thick
2 yellow squash, cut crosswise into 6 slices, ¾ inch thick
2 red bell pepper cut into 1 inch squares

Marinade
¾ cup balsamic vinegar
¾ cup olive oil
2 TBS Creole Seasoning
2 tsp dried rosemary (if using fresh use 1 TBS)
2 tsp garlic powder

Cut chicken breasts into large cubes. Set aside
Combine marinade ingredients, mixing well. Divide marinade in half. Place chicken in a large non-metallic dish or re-sealable plastic bag. Pour half of marinade over . cover or close the bag and refrigerate 2 hours.

Combine remaining half of marinade with cut vegetables in large non-metallic dish or re-sealable plastic bag. Toss to coat and marinade 15 minutes.

Preheat grill and lightly coat grill rack with oil or cooking spray.Using 12 metal skewers thread chicken cubes and vegetable slices on skewers, alternating chicken with 1 piece zucchini, 1 piece squash, and 1 piece bell pepper. Begin and end with chicken cubes. Discard marinade from chicken; reserve vegetable marinade.

Using 12 metal skewers thread chicken cubes and vegetable slices on skewers, alternating chicken with 1 piece zucchini, 1 piece squash, and 1 piece bell pepper. Begin and end with chicken cubes. Discard marinade from chicken; reserve vegetable marinade.

Place filled skewers on prepared grill and grill over medium high heat, 4-6 inches from source of heat, about 6-8 minutes per side or until chicken reaches 160F on meat thermometer. Baste once or twice with reserved vegetable marinade. Serve hot.


Pignoli Biscotti
Here is the recipe for the Biscotti that I baked the other day when complaining about the CPA and IRS. This is super simple. Why pay for the those pre-packaged Biscotti at work when you can make your own under an hour and take them to work fresh from home! This is a great recipe for beginning baker wanna bes. Really! For another Biscotti recipe you can check out Susan's recipe at Farmgirl Fare. Susan does some great recipes and you can bet they are truly doable.

Pignoli Biscotti
2/3 cup pine nuts
1/2 cup butter
1/4 cup sugar ( have to use the Splenda for Baking)
2 eggs
2 TBS lemon juice (fresh)
2 TBS lemon zest
2 cups plus 2 TBS unbleached or all-purpose flour
1 1/2 tsp baking powder
1/4 tsp salt

Place nuts in a shallow pan and bake in a 350 degree oven for 6-8 minutes, or until golden brown. Let cool. In a mixing bowl cream butter and sugar until light and fluffy. Beat in eggs, lemon juice and zest. In a bowl combine the flour, baking powder and salt. Add to the creamed mixture, mixing until blended. Fold in nuts. Divide dough in half. On a greased and floured baking sheet pat out into two logs about 1/2 inch high, 1 1/2 inches wide and 14 inches long, spacing them at least 2 inches apart. Bake in the middle of a preheated 325 degree oven for 25 minutes or until lightly browned. Transfer from the baking sheet to a rack. Let cool for 5 minutes. Place on a cutting board. With a serrated knife slice diagonally at a 45 degree angle about 1/2 inches thick. Lay slices flat on the baking sheet and return to the oven for 10 minutes longer, turning over once, to dry slightly. Let cool on a rack. Store in a covered container.
Makes about 3 1/2-4 dozen

Notes: When you bake the pine nuts, really watch them closely. If they get too brown they taste on the bitter side. It doesn't take long for them to burn so don't get on the computer to read blogs and forget them! I used Splenda for Baking instead of sugar and I really couldn't tell a sweetness difference. If you don't like artifical sweetners the regular sugar works great. I have used both. I have to say that when I form the dough into the log, I cut it into two smaller logs. It seems to take a little less time for the first baking. I never get as many Biscotti as the recipe says it will yield but my cutting and measuring skills are lacking. I just cut them the thickness I like.

This recipe came from Biscotti by Lou Seibert Pappas

Sunday, April 16, 2006


Who said that Moose only live in the woods?
Here is my entry to Weekend Dog Blogging. You will want to check out the other beloved K-9s at Cate's place.


Meet Moose Brown. Sounds kind of silly for a Doxie, but here is his story. Sadie is his mother and Edward is his father. His older brother died during birth and we did the best we could to revive him. I knew that Sadie was in distress and having never delivered puppies before, I had no earthly idea what to do. I called the vet and they said to bring her right over. They took her and gave her an X-ray to see if there were anymore puppies. Yes, there was one more little soul in there. Moose was delivered by C-section and weighed in at exactly 4 ounces. They had a hard time getting him to breathe at first but he came around. When I held him in my hands, it was like holding cotton candy; you could see it but bearly feel it. We took him home along with his mom that day and watched him like a hawk. I think I was more of a nervous mother than Sadie. She did a great job for being a first time mom. She knew exactly what to do. I was shocked.

Since the puppy had such are hard beginning I thought he needed a big name to get his life going. So since his father was named after Eddy on Frasier, I decided to name him after Eddy's (the TV dog) REAL name, which is Moose. So now we have this little tiny thing with a huge name. He did not disappoint us at all. He grew up to weigh 22lbs and has feet like a Basset Hound, which really surprised us since both his parents are minis and weigh under 10 pounds each.

Moose isn't not very bright, but what he lacks in smarts he makes up ten fold with love and devotion. He loves his little brother Charlie and is devoted to being a good Doxie pack member. He is all about sleeping, eating, and licking everything he can get that tongue on. We just call him our "tongue with legs".

This picture can be taken everyday at least twice a day. Moose and I play this game called "stair kisses". He gets to a certain point on the stairs and just sits there and waits for me to let him give me kisses through the stairs. We do this every morning when I roust him out of his bed and every night when we are on our way up to bed. None of the other dogs do this, just Moose. I have no idea how this behavior started but it ours to share and I love it every day. He is a very sweet soul.

Thursday, April 13, 2006


Soothing the Savage Beast
I had a lovely quiet and wonderfully blissful morning yesterday until the phone rang. It was the CPA. I like this man and have known him for about 6 years now. Yesterday I wanted to do horrible unspeakable things to him. The news was not good at any level. We owe the IRS and the state of Virginia an obscene amount of money. Yesterday was the 12th and we have to have our taxes postmarked by the 17th not to pay a penalty and a disgusting interest fee.

So what do mad chefs do when getting bad news?? We sooth the savage beast by BAKING. Being left home alone on what was supposed to be a lovely day off, was dangerous. I was mad, mad, mad!! It is three days until I can go grocery shop and there are no cookies, no chocolate (that in itself is a HUGE crime) and no ice cream to drown my tax sorrows in.

I was on a tear! I looked high and low to make something, anything to take my mind off of owing so much money I wanted to faint. I am an avid tea drinker and believe that you should always have a biscuit or small cookie of some sort when you have a proper cup of tea. Biscotti, would do the trick.

I have to say that as little as I bake, I do still enjoy it. You don't really have to be good at it but you have to like it. It made me feel less beastly about the CPA and I got a treat with my afternoon cup (pot) of tea. When you feel horrible, create something. It takes your mind off of what could have ruined the rest of a perfectly lovely, sunny, warm day.

Here is what bliss looks like before you cut it up and bake it a second time.


Here is savage soothing bliss after second baking and skillfull stacking...now for the best part...

Now does anyone know of a good bank that needs to be relieved of some of their money?

Wednesday, April 12, 2006

Herbed Roasted Pork Tenderloin (no recipe needed)
I was looking through some old pictures that I had taken for the blog which I never posted. I found this series of pictures that would fit in with the KIS theme from the other day. I use recipes once to see how it works, then rarely after that. I know that some of you out there in Blogland need to/have to have a recipe. Believe me, I understand but you need to break out of your comfort zone and try something without a recipe to build up your confidence. Here is the perfect "recipe" for your "no recipe" meal.

I am a huge fan of pork tenderloin. I could care less about "The Other White Meat" campaign. I just love the stuff and it's extremely easy to play around with. So many herbs, fruits and flavors go perfectly with pork. So let me show you how easy it can be.

Take one naked pork tenderloin (not packaged with any of that disgusting marinade) and clean it up. By cleaning it up I mean, to cut off any unwanted fat and silver skin. You can either use a boning knife (I never use this) or a chef's knife (more my style) or a paring knife (easy for little hands) to get the silver skin off.
The silver skin can keep any marinades or seasonings you use on the tenderloin from penetrating it and leaving fabulous flavors behind.

I used whatever I could find to put on the tenderloin to make any coating on the outside stick.

I am a mustard lover from way back when. My dad introduced me to mustard and the lesson continues to this day. At any given time I have at least three different kinds of mustards squirreled away in the refrigerator or the "back-up" stash in the pantry.

I took some mustards and mixed them up on a plate. I then rolled the tenderloin in the mustard making sure it had a healthy coating. Next, I rolled the tenderloin in every herb both fresh and dried that I had in the house.
I had a huge bundle of fresh parsley left over from a client's cook day and chopped that up too. Everything was mixed and again laid on a plate for easy rolling.

After the tenderloin is coated, I then took about 2 TBS of olive oil and put it in a hot skillet. I seared the tenderloin on all sizes and popped it into a 450 degree oven in the same skillet I seared in. I set the timer for 10 minutes, tested it for doneness and decided it was a bit too pink and left it in for another 10 minutes. I like my tenderloin slightly pink on the inside. Here are the results. I also cooked some saffron steeped couscous and some garlic sauteed green beans to round out the meal. Pretty tasty for little or no effort and no recipe.


Cook's Note: As Ilva noted in her comment to me-this pork is too rare for anyone to safely eat. I cut open the tenderloin and saw how pink it was, took the picture and then put it back into the oven for yet another 10 minutes. Sorry-I should have noted that when I posted the picture. I looked through the photo files and I only took pictures of the pork this rare. It made a great picture, but not so safe for eating.

Monday, April 10, 2006

KIS (Keepin' It Simple)
I wasn't really in the mood to cook last week because of hubby's late hours. Hubby calls me from the road to estimate what time he thinks he will be home. So I usually pick things that can be put in the oven that will take about 30-40 minutes. I had a lot of vegetables in the crisper and needed to use them before they went bad. So...I used as many as I could for this dinner and two other dinners.

I bought the two largest green bell peppers I have ever seen at the commissary and needed to figure out how to use them. Stuffed Bell Peppers is a quick, easy and healthy way to use them up. I had cooked some rice a month before and of course had excess and froze it. Freezing rice is super simple and very cost effective. You just thaw it out just like anything else; on a plate overnight in the refrigerator. After thawing the rice to break up the clumps, you run your hands under cold water and then start breaking up the clumps. The rice separates beautifully.

I didn't want to boil all the vitamins out of the green bell peppers (really I waited a bit too late to boil them on the stove) and I gave them a quick microwave to soften them up after cutting off the tops and cleaning out the seeds. I had a package of 93% fat free hamburger meat that weighed 1 1/2 pounds. Way too much for us to eat at one meal. I hate wasting things like that so I took the whole package of meat and crumbled it up in the skillet to cook. I took out half of the cooked meat and let it cool, wrapped it up and put it back into the refrigerator for later use. The thawed rice and ground meat were mixed in the skillet along with some s&p, fresh chopped parsley, one beaten egg and some shaved parmesan cheese. I scooped that mixture into the microwaved peppers and put them into a casserole dish. Two 8oz. cans of tomato sauce were opened and poured over the peppers and that was then popped into a 350 degree oven for 40 minutes.


I still had way too many vegetables in the refrigerator so I made one of my favorite recipes; Roasted Vegetebles-South Beach style. I love this recipe because you really don't need to read a paper to make it. Zucchini, Squash, Red Onion, Mushrooms, and Asparagus, 3 TBS olive oil, s&p.


You can't get any easier than that. Everything is chopped up and then tossed with the olive oil and s&p and then spread on a baking sheet and baked in the oven.


This is a year round favorite for me; dieting or not. That was one night's dinner and I still had more tricks up my sleeve to make my life simplier. The other half of the hamburger meat was already cooked and ready to go into a jar of Paul Newman's spaghetti sauce. This was dinner number. We didn't eat any vegetables with that dinner but I had got another idea! I had left over veggies from the night before so while the spaghetti was boiling, I put on a second pot so I can could half a box of mini penne pasta. I took the mini penne pasta and the left over South Beach veggies and mixed them together to make a roasted veggie pasta for dinner the next night. I took some red wine vinegar, olive oil and every dried herb I could scare up with a tsp of sugar and whisk them together for the dressing on the pasta salad. The roasted vegetable pasta was then used to eat with Honey Mustard Chicken Breasts the next night.

The whole point of this post is that if anyone just gives a few more minutes to each meal it could be the ground work for a quicker meal the next night. I know most of you have full-time jobs and a family to boot and time is precious. Take a few minutes to plan three meals during your week where you build off a few ingredients to make the next meal.

Sunday, April 09, 2006

Weekend Dog Blogging
You want to see more foodie pictures of their beloved pooches, go to Cate's place and check them out!

I think we need a larger foot stool. Top to bottom is Moose, Charlie and then Sadie. Ed decided that he wanted the love seat all to himself. Smart boy. We had some really fabulous weather this past week and the dogs took full advantage of the warm weather to work on their tans.Eddy doesn't usually go out side and lay in the sun. He is a more prissy boy and like to be in the house with me all the time.

Charlie found a stick to chew until he finally fell asleep with the sticks between his paws. Sadie never needs any reason to fall asleep!

Tuesday, April 04, 2006

Lamb Chops (not the puppet)
I have had this post for a few weeks but forgot about posting it. We had a wicked storm last night with little tee tiny balls of disaster falling from the sky. No logging onto the computer to post anything last night. So with no further delay...Pan Roasted Lamb Chops with Rosemary Balsamic Syrup & Wilted Spinach.

This is a very easy dish to make. I can't demo anything that is complicated at the store demos. The whole idea is to get folks into the kitchen and get them cooking. Besides, who says cooking food that looks good and tastes good has to be hard, complicated or expensive? Now lamb chops are $7.99 a pound, but this is the exception not the rule. Since I did this in mid March, it was to promote spring lamb. Many folks eat lamb for Easter and this is one way to fix it that is super simple!


Pan Roasted Lamb Chops with Rosemary Balsamic Syrup & Wilted Spinach
Step 1: Make the balsamic rosemary syrup in a non-reactive saucepan, combining the following:
3/4 cup Good quality balsamic vinegar
1/4 tsp fresh rosemary, freshly chopped rosemary (you can use dry also if you can't find any fresh)

Over moderate heat, let mixture reduce until it is syrupy. This process will take about 8-10 minutes. You will not want to do this in the house!! You can use your grill outside to do this but it might take a bit longer. The fumes from this process will knock you socks off! The smoke alarm in your house will go off and everyone in your house will hate you for days if you do this in doors! If you have a tropical bird you know you can not do this anywhere near your bird. I can't stress enough to not do this in the house.

Lamb Chops
4 Fresh Market Premium lamb chops, trimmed of all visible fat
1 tsp of garlic, finely chopped
1/2 tsp salt to taste
1/4 tsp black pepper, freshly cracked
2 TBS Fresh Market Olive Oil to coat the pan
1/4 cup of your favorite light red wine, maybe a Pinot Noir

Season the lamb chops with salt and pepper. Heat a skillet on medium high heat, and heat the olive oil until it begins to smoke. Cook lamb chops for approximately 4-5 minutes (depending on the thickness) to yield medium rare. Remove chops and set aside. Add chopped garlic, and cook until the garlic is just softened (do not brown; it makes garlic bitter), about a minute. Take pan away from heat and then add the wine to deglaze. Pour sauce over lamb chops and cover with foil to keep warm.

Wilted Spinach
1/4 cup red onion, finely chopped
1 tsp garlic, chopped
1 TBS olive oil
1 large bag of washed and ready to use Spinach

In the same pan used for the lamb chops, combine the olive oil and garlic and cook over medium high heat until softened; about 3 minutes. Add the spinach to the pan. Keep the spinach moving during the wilting process to prevent burning or sticking.

Final Assembly
Plate spinach onto serving plates. Place lamb chops over the spinach. Drizzle with Balsamic Rosemary syrup.